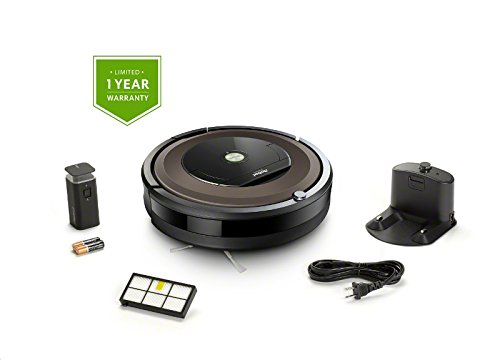
How to solve when your Roomba won’t dock
Remember that problems with robot vacuums sometimes occur, especially if it is not cleaned frequently. However, it is much easier to clean the house with the help of iRobot Roomba.

You find that your robotic vacuum cleaner doesn’t come back to its Home Base when finishing the cleaning cycle.
How to deal with this problem? Check all the ideas below:
- Have a thorough look at the charger line cable to see if there’s any potential damage.
- Plug the charger into a wall socket and make sure the power indicator displays the solid green color.
- Connect the charger with the home base and make sure it fits once being inserted substantially. Designed for energy efficiency, the power indicator usually exposes solid for 4 seconds before shutting off.
- Double-check for no virtual wall; actually the unit’s virtual wall lighthouse will stay within 2.4 m (approx. 8 ft.) of the home base which could stay away from infrared beam hindrance.
- Insert the home base in an open area.
- Avoid any of exotic objects on the bumper as well as docking station.
- Use a dry cloth to remove debris from your iRobot Roomba; plus, also clean the charging contacts on the home base.
- Place this robotic vacuum cleaner within 6 ft. of the home base and then hit Dock button for it to come back.
The solution above can apply to Roomba 650, 860, 880, and 980 only.
In case Roomba leaves the virtual wall for a cleaning cycle, make sure you activate the virtual wall and adjust the beam to face the exact approach of the robotic cleaner’s proposed area to close off.
iRobot Roomba can give a cleaning tour to multiple rooms in one cycle. Sometimes it may fail at tracing the home base when reaching the end of a complete mission.
Why My Roomba Does Not Turn on?
Despite the convenience, iRobot vacuum usually encounters different issues, such as not charging, not docking, not responding, or not turning on.
If your new Roomba happens to not turning on, let’s check and see whether it’s been activated yet. Maybe the battery probably has been displaced during the shipment process. Usually the iRobot Roomba 537 Vacuum Cleaner Battery will be detached from the unit; only put it back in the robot after the unboxing.
Plug in the docking station and authenticate its indicator light displaying once every 4 seconds. In case the light turns off, you can consider charging in a second outlet and test either the home baseline cable or charger is damaged. Find a replacement once the charge base seems unable to open.
How about the light illuminates but the robotic cleaner is not yet charged?
Look at the charging communications and see if they have any debris or dirt. If available, then simply remove them away using a soft dry cloth.
First and foremost, take your Roomba away from its charging base. Next, turn it over in order to remove the caster wheels – make sure there’s no dirt in the caster wheels or the robot cannot approach the charging contacts. As soon as you find your Roomba unit won’t dock, quickly check the caster wheel.
Just place the robotic vacuum cleaner on the home base and charge it for at least one hour. Instantly keep an eye on the charging error messages display once Roomba comes up with an error message during the charging process as well as the home base’s troubleshooting indicator keeps flickering.
Here come most commonly potential problems when your iRobot Roomba won’t get charged on base or simply won’t hold a charge:
- Power source issues
- Contact dust
- Wrong type battery
Whenever there’s an error, our robotic cleaner will demonstrate an error code which makes it easy for consumers to solve the problem without causing much trouble.
Did you enjoy this post? Why not leave a comment below and continue the conversation, or subscribe to my feed and get articles like this delivered automatically to your feed reader.

Comments
No comments yet.
Sorry, the comment form is closed at this time.