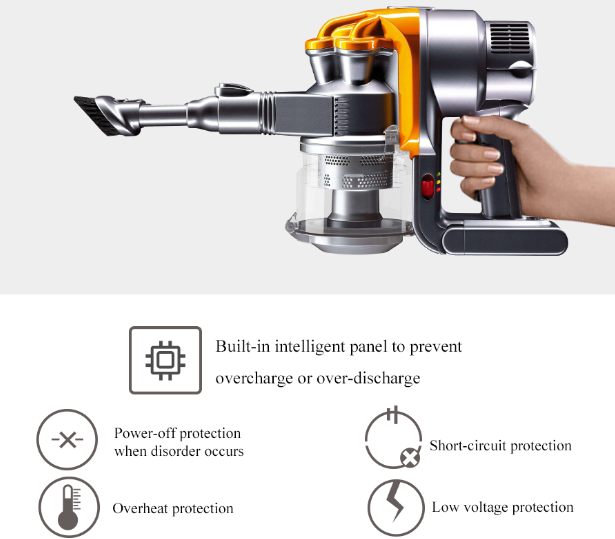
Save on Dyson DC16 battery pack 912433-03
Product Specifications for Replacement Dyson DC16 Vacuum Battery
Tech Specifications:
| Australia leading battery supplier: | BattAussie.com |
|---|---|
| Voltage: | 22.2 Volt |
| Capacity: | 2000 mAh |
| Type: | Li-Ion |
| Length: | 4.96″ |
| Width: | 2.92″ |
| Height: | 0.98″ |
| Shipping Weight: | 1.00Lbs |
| Warranty: | 1 Year |
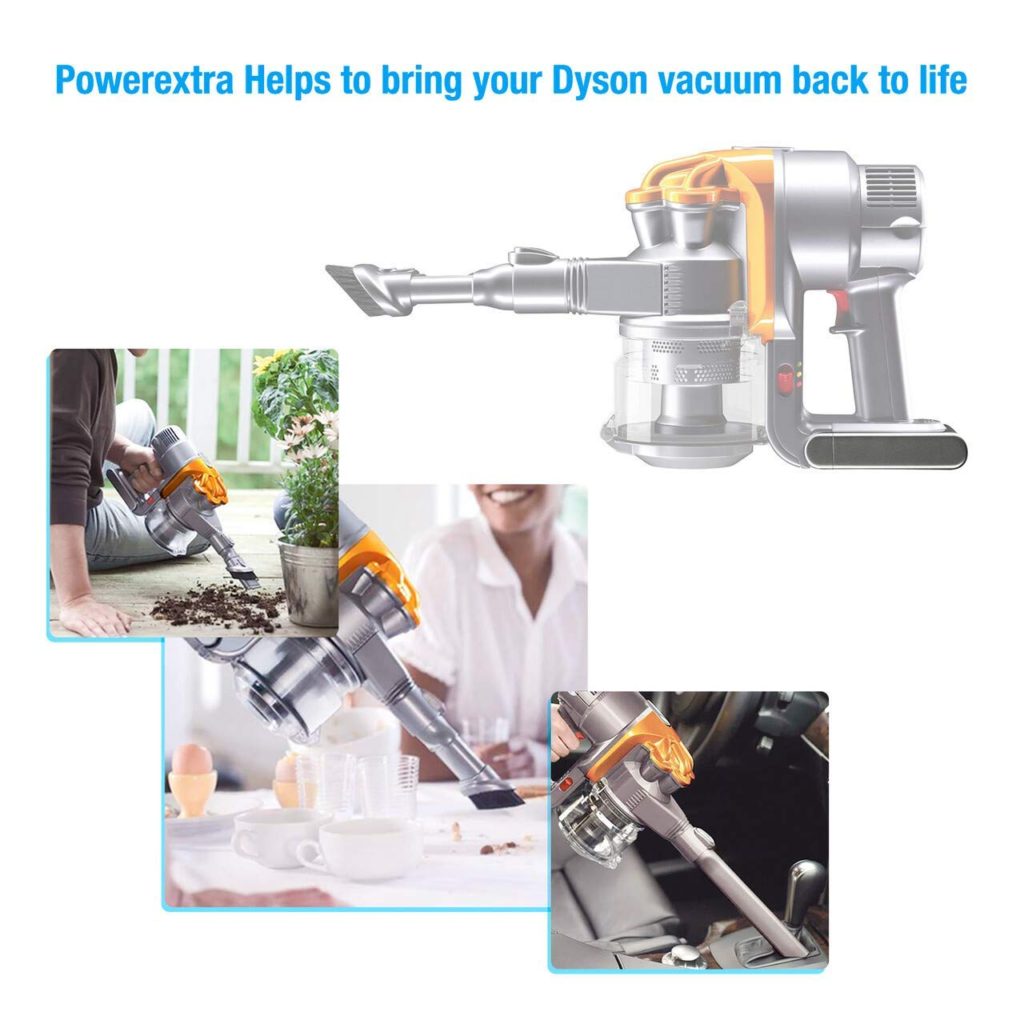
This replacement battery is 100% compatible with the Dyson DC16 and all compatible models. Our Dyson vacuum cleaner batteries and accessories are made with high quality parts and are guaranteed to meet or exceed the original equipment manufacturers specifications at a reduced price. All batteries are tested for 100% Quality Control Assurance.
This replacement battery includes a 1 Year Warranty to guarantee that it has no manufacturing defects. The Replacement Dyson DC16 Vacuum Battery has been cross-referenced to be compatible with or replace these OEM part numbers and models: 12097 912433-01 912433-03 912433-04 BP-01 CS-DYC160VX VLI-104 DYSON
This battery can be used in these models: DYSON
- D12 Cordless Vacuum
- DC16
- DC-16
- DC16 Animal
- DC16 Handheld
- DC16 Issey Miyake
- DC16 Root 6
How to improve Toshiba pa3533u-1bas laptop battery level
Australia leading laptop batteries, laptop ac adapters & cordless drill batteries supplier: battaussie high performance Toshiba laptop batteries are designed to complement the fit and finish of your Asus notebook. This battery is manufactured using the highest quality battery cells with integrated charge indicator LEDs. Depending on the battery capacity you’ve selected some upgrades last up to 68% longer than the factory issued notebook battery. This Toshiba battery will perform better and fit more snugly than anything else on the market.
Improve Toshiba pa3533u-1bas Battery Level Giving You Long-Term Power
BattAussie’s premium toshiba notebook batteries, for example, are some of the very best and provide long run-times. They contain the same reliable components as the original Toshiba laptop batteries, often outperforming the original Toshiba PA3757U-1BRS Extended Life Battery itself.

AussieBatt’s laptop computer battery is built for longevity. It’s environmentally responsible and feature RoHS certification to be free of anything harmful including lead, mercury, cadmium, PBBs, and PBDE. BattAussie try to provide 100% customer satisfaction. That’s why we offer a 30 day money back guarantee, no-questions-asked policy, plus a 1 year extended warranty as an added option. We remove all risk to ultimately make our customers happy with their purchase.
How to replace Dyson DC16 Vacuum Cleaner Battery
Heavy duty brand new Vacuum Cleaner Battery 21.6V 2000mAh for Dyson DC16 Root 6 Animal BP01 12097, 100% Brand New High Quality Rechargeable Replacement Battery.
| Battery Type: | Lithium-ion (Li-ion) |
| Voltage: | 21.60V |
| Capacity: | 2.0Ah |
| Color: | Silver Grey |
| Product Type: | Replacement Vacuum Battery |
| Condition: | Brand New, full 1 year warranty! |
Compatible Part Numbers:
12097, 912433-01, 912433-03, 912433-04, 912441-01, BP-01
Compatible Model Numbers:
Dyson
Dyson D12
Dyson DC12 Vacuum Battery
Dyson DC16, 12097 Motorhead Cordless Vacuum Cleaner
Dyson Hand held Vacuum Cleaner
Dyson DC16
Dyson DC16 Animal
Dyson DC16 Pink
Dyson DC16 Issey Miyake
Dyson DC16 Root 6
Dyson DC16 Car and Boat
How to Replace Dyson Vacuum Cleaner Battery Packs
- Take off the dust cage.
- Remove the Dyson vacuum battery and install the new Dyson DC16 Battery Pack 12097.
How to get the best life out of Toshiba PA3757U-1BRS battery
Thanks to advancements in mobile technology, modern notebooks are more powerful than ever before. Laptops are also more efficient as well, giving them ever greater battery lives.
Laptop battery life is a chief cause of mobile moans, it’s possible to get significant improvements by good practice and a few software tweaks. Today BattAussie battery experts share the tricks to help you get a longer Toshiba PA3757U-1BRS laptop battery life.
Handy notebook battery life tricks
1. Adjust laptop computer screen brightness
Modern displays with LED backlights are a major improvement over the CCFL (cold cathode fluorescent tube) backlit displays of yesteryear, in terms of both picture quality and power efficiency. Still, a laptop’s display claims a significant percentage of the power that the system consumes. As such, keeping the screen backlight low can increase your laptop’s run time noticeably.
2. Change laptop battery power settings
 Windows 10 comes with some great power features, which enable you to eke out the best performance when you’re plugged into the mains, and optimise Toshiba pa3534u-1bas battery life when on the move.
3. Plug in whenever possible
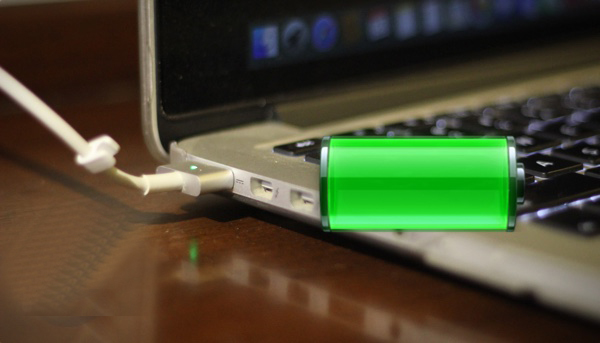
One surefire way to ensure that your laptop is always ready for action is to plug it into an AC outlet whenever possible. Keeping the machine fully charged makes it far more likely that you will always have the juice you need to complete your work. Purchase at least one extra AC adapter, so you’ll always have one in your office and one in your laptop bag for travel.
4. Laptop battery care
Lithium-Ion laptop computer batteries don’t need a complete discharge (contrary to popular belief) but also you should use a HP 484170-001 spare battery once you’ve charged it. If you have a spare you keep topped up, use that instead of your main regularly. If you have an older non-Lithium-Ion battery, you’ll need to regularly discharge it.
5. Disable unneeded devices
You can disable unneeded hardware devices or ports to squeeze out a few more minutes of power, although this option isn’t possible with every laptop. Start by disabling unneeded wireless capabilities, such as built-in data modems and Wi-Fi and Bluetooth radios.
Usage tips to brand new HP 446506-001 replacement battery
HP Pavilion dv6000’s sleek design and shiny finish hold their own next to systems from style-conscious manufacturers such as Apple and Sony. Aside from its good looks, the dv6000 also provides a solid set of entertainment features and high-end components for a fair price. Those components didn’t result in record-breaking performance, and its HP 446506-001 battery life was below average. To maximize the HP 446506-001 replacement laptop battery run-time, today BattAussie battery experts share following tricks to improve the laptop battery performance.
Essential usage tips to the brand new replacement laptop battery
- Please charge 3-4 hours before using the new replacement notebook battery for the compatible model laptop for the first time; normally it requires two to three charge/discharge cycles before achieving maximum battery capacity.
- If external power supply will be used for a long time, please remove the replacement battery from your laptop, which can increase the battery life, as connecting to a power supply each time is considered to be a single battery charge.
- Never short-circuit the battery pack by either accidentally or intentionally bringing the terminals in contact with another metal object. This could cause personal injury or a fire, and could also damage the battery pack.
- If your replacement battery will not be in use for a long time, remove it from your laptop and store it in an Anti-Static bag in a dry, cool place; Make sure that the HP pavilion dv6000 battery is preserved with electricity(about 30-50% of its capacity) and it is highly recommended that the battery should be charged at least once a month.
How to fix a cordless tool battery when it won’t charge
If you have any cordless power tools, especially Ryukyu, you will undoubtedly encounter a terrible red charger light. If you don’t… You will. It’s inevitable – you run into the basement and get your cordless drill, because after 10 years of thinking, you’re finally going to build the 4 Tudor’s small kitchen with a small kitchen. Or you have to hang up a picture.
Either way you put your battery in the charger and all you get is a flashing red light, which according to the label on the charger means your battery is defective. It isn’t just dead. It’s “defective”. I’m here to tell you you it isn’t. You probably left it in the charger too long which weirdly drains the battery.
Your battery is fine. It just needs a little boost.
You Can Fix a Rechargeable Battery That Won’t Take a Charge.
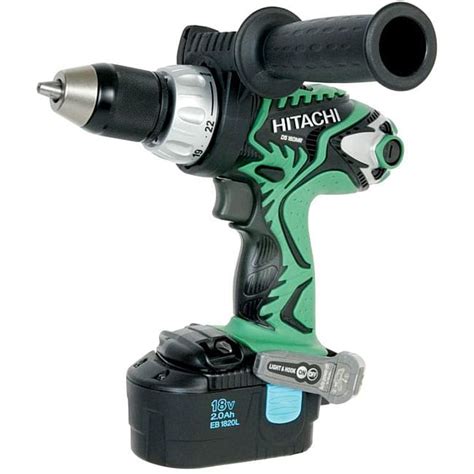
You heard me right. You do NOT have to buy a new $50 battery. You do not have to call the company and swear at them because this stupid “defective” battery is only 2 weeks old. (although by all means feel free to do so) You do not have to wait until they ship you a replacement HITACHI EBM1830 Power Tool Battery to finish your project. You can get that battery up and working in about 5 minutes.
How to Fix a Lithium Ion Battery
Note: If you aren’t used to doing this sort of thing, or using things like a “multimeter” this is going to seem crazy and hard and way out of your DIY league. It isn’t.
Steps
Step 1. Cut the end off of your AC adapter. That’s right. Just cut it off. It’s for a 10 year old cell phone, you’re never going to use it again anyway. It’s frankly kind of weird that you saved it to begin with.
Step 2. Separate and strip off 1″ of each wire. You have *just* made booster cables! Good for you.
TIP:
Black wire = negative Striped or solid white wire = positive
IT IS VERY IMPORTANT TO NOT MIX THE TWO UP.
Step 3. Remove the screws holding the battery together.
For Ryobi batteries it’s a star shaped screw head like this.
A few years ago I bought a kit of weird small screwdriver heads from Amazon. I initially bought it because I needed a special tip for removing my Macbook Pro cover to replace the battery. But I’ve used it for a ton of other stuff since getting this kit.
TIP:
There’s a hidden screw under a piece of plastic. You need to pry the plastic off to get at the screw underneath. I used a very thin screwdriver to pry it off.
Step 4. Pull the top off of the battery case.
Step 5. Remove the 2 plastic side pieces. They’re the things you press in to remove your battery from your drill.
Step 6. Lift the battery pack out.
Step 7. Set the Multimeter to read volts. For testing an 18 volt Hitachi BCL1815 Cordless Tool Battery choose the 20 volts setting. This will give you the most accurate reading. (If you don’t have a multimeter skip to Step 9 and hope for the best)
TIP:
Volts are symbolized by a “V” with one or two straight lines over it on a multimeter so it’s that section of the multimeter that you use. The section under the V with the straight line(s). Not the squiggly line. The straight line.
Step 8. Touching the red probe to the positive (red) terminal and the black probe to the negative (black) terminal, read the voltage shown on the multimeter. In my case the battery was carrying a charge of 0.06 volts. Which is *almost* nothing, but not completely nothing.
Step 9. Plug your AC adapter in and using the wires, boost your dead battery. Just touch the black wire to the negative terminal (the one with the black wire going to it) and the white wire (or striped wire) to the positive terminal (the one with the red wire going to it). Do this on and off for approximately a minute.
TIP:
Apparently lithium ion batteries should be “pulse” charged. Which means you hold your wires down for 15 seconds or so, then release them. Then hold them down again. Over and over.
DOUBLE CHECK THAT YOU ARE TOUCHING POSITIVE TO POSITIVE AND NEGATIVE TO NEGATIVE.
Step 10. Test your the voltage on your battery pack again. It should be higher than it was before boosting. (Again, if you don’t have a multimeter don’t worry about this – you’ll just have to press on without one)
Mine went from 0.06 volts to 7.58 volts after a minute long boosting session.
Step 11. Put the plastic cover back on the battery pack (just the part that goes into the charger) and set your battery on the charger to see if it will take a charge.
If you still only get a red flashing light and the battery won’t charge, boost the battery some more. I find the battery charger will recognize that the battery is good again when you boost it to between 10 and 14 volts.
Just keep repeating the “pulse” boosting and testing the electric tools battery until it will finally be recognized by the charger and you get the green light.
To those of you who found this subject matter to be on par with spending 3 hours in a waiting room, sorry ’bout that.
What is the best way to store lithium ion batteries ?
Some of us use laptops as desktop alternatives, so it doesn’t make much sense to put batteries in notebook computers. This eventually reduces its energy storage capacity. This is the best way to store it.
Storing a Lithium-Ion Battery
But will my laptop work without the battery while it’s plugged in?
The answer is yes, while plugged into AC, your laptop will work just fine even if the battery isn’t inside it, as detailed in this article. Now that we’ve got that out of the way, let’s see what the best way to store a laptop battery is.
Today, Lithium-Ion batteries are the battery type found in pretty much 99% of all laptop PC and devices sold over that past five years. Now although most Lithium-Ion batteries will perform well for 2-3 years, if you want to extend the life of your Dell inspiron 1520 laptop battery, you can following a few tips.
First, before storing your battery, make sure it’s not empty. Over time, batteries will leak power so if it’s stored at no charge in it, there’s a chance it won’t accept a charge again. Since this defeats our goal of extending the life of a battery… don’t do that!
In order to lose the smallest amount of power while in storage, change your battery to 40% then unplug it and store it in a temperature controlled location. The below graph outlines the ideal charge point and temperature for battery storage.
| Storage Temperature | Charged to 40% – capacity loss after a year | Charged to 100% – capacity loss after a year |
| 0 °C (32 °F) | 2% | 6% |
| 25 °C (77 °F) | 4% | 20% |
| 40 °C (104 °F) | 15% | 35% |
| 60 °C (140 °F) | 25% | 40% |
As you can see, 0 degrees centigrade (which translates to 32 degrees Fahrenheit) and 40% battery charge loses the least amount of power. Just 2%. The reason is that constant temperature is your best friend. Now the good news is most refrigerators hover between 34-38 degrees Fahrenheit which is almost perfect. It also provides the battery a constant temperature that rarely changes.
Charge my battery to 40% then stick it in the fridge. Got it. Anything else?
The problem with a refrigerator is that it’s a damp environment, which could cause parts of the battery to rust. So, before you put the battery in the refrigerator, make sure you put it in a Ziploc bag. If you want to take extra precautions, I also suggest putting a desiccant in the Ziploc bag, along with the battery. Getting one shouldn’t be too difficult – almost anything you buy these days will be packed with one.
It’s also a good idea to remove the battery from your fridge every month and perform a full recharge-discharge cycle before putting it back in. Before you put it back in the laptop, though, make sure that you let the Ziploc bag containing it reaches room temperature. If you don’t, there’s a serious risk of damaging the battery. If you follow the instructions above, your Lithium-Ion battery will be in great shape next time you need it.
How to reset the undetected and uncharged Dell laptop battery
Have you ever taken out a laptop at a local coffee shop, pressed the power button, but found nothing happened? Well, what happened to us before is sure to happen to you.
Should have seen it coming
Most of the time you’ve seen this coming. You knew the battery was getting old and it hasn’t been holding its charge for nearly as long as it used to. But that’s ok, you thought. You’ll just make it work until it won’t work. Thankfully, you have a power cord with you.
but the battery isn’t that old or is brand new
But what if you have a battery that isn’t that old, worked perfectly fine yesterday, or is brand new? This might confuse you a bit. It did for us! We broke down and bought a new battery only to find out that the new battery didn’t work either. But the batteries worked in other laptops. To further complicate matters, the laptop’s battery light was blinking, which we learned is an error code (number of flashes equaled a code number) but there was no information anywhere as to what the error code meant. Dell’s technical support team also had no idea what the code meant.
It’s Just a ‘Temporary Battery Failure’
Dell’s technical support personnel may tell you that the problem is a ‘temporary battery failure’ with no further explanation and that you will need to purchase a new Dell inspiron 1520 battery for your system. You trust that Dell support representatives know what they are talking about, so you break down and purchase a new battery. But you may purchase a new battery and find that it exhibits the same exact symptoms as the “failed” battery. How can a brand new battery not work? The temporary failure simply means that the laptop temporarily can’t communicate with the battery.
Laptop: I Can’t Find You!
The problem with many Dell batteries relates to the laptop’s failure to detect a microchip located inside the battery assembly. This microchip is responsible for saying, “Hey! I’m a genuine Dell battery. It’s safe to charge me now.” If the laptop does not detect this microchip, the battery may charge slowly, may not charge at all, or may not turn the computer on even if it’s fully charged.
Why Won’t The Laptop Recognize the Battery?
If the sensor isn’t working properly, you may find that a fully charged and functioning battery won’t power on the laptop or will flash error lights. If this is the case, you don’t necessarily have to run out to buy a new battery if the sensor is just not correctly detecting the battery.
Why does the sensor stop reading the battery?
The problem can happen for many reasons, which can include the battery at one time not being properly seated in the computer, a power surge, or even being removed from the computer while charging. While the exact cause is sometimes a mystery, it can be fixed.
not the original battery
If the laptop won’t recognize the battery, it’s also possible that you do not have an original battery. It may be a counterfeit or an aftermarket replacement battery. Many aftermarket batteries, which are typically of much poorer quality, aren’t built too the exacting standards as required by the computer manufacturers.
Why Do Batteries Have This Sensor?
According to Dell representatives, original Dell batteries have these microchips to help consumers detect counterfeit batteries. This could be a good thing for consumers. If you buy what you think is a genuine Dell battery from a third party, you should be able to know pretty quickly if you have a counterfeit. That is, unless the counterfeiters have taken a microchip from a dead genuine battery and have inserted it into the counterfeit.
It’s Possible To Reset The Sensor
To correct this issue, you might just need to reset the system’s ability to detect the battery. Unfortunately, however, many of Dell’s technical support staff are either unaware of this procedure or are being pressured to sell new batteries. Of course, it is somewhat difficult for a technician thousands of miles away to know the difference between a battery that has truly failed and a battery that simply isn’t being detected properly.
How To Reset The Dell Battery Sensor
You can follow the following steps, which take only minutes and require no tools, to attempt a reset of your Dell battery:
- Completely power down the laptop and remove the cord from the computer.
- Flip the laptop over.
- Push on the battery release button or buttons to release the battery form the computer and remove the battery.
- Power on the computer without the battery, allowing it to boot completely.
- Completely power the computer down and remove the cord once again.
- Reinstall the battery, plug in the power adapter and re-boot the computer.
My Battery Still Doesn’t Work
If the battery sensor simply needed to be reset, the computer should now be correctly detecting the laptop battery. Unfortunately, if you are still having trouble with your battery, you may need further laptop and battery diagnostics or even a new battery.
Genuine vs. Aftermarket Batteries
If you do need a new Dell latitude e6400 laptop battery, we always recommend getting an original battery from the manufacturer of your device as there is no way to guarantee a battery is genuine from a third party seller. Counterfeit batteries can catch fire or explode. Aftermarket batteries might be a very inexpensive option, but you get what you pay for. You may find that an inexpensive aftermarket battery won’t hold a charge after just a few weeks. There’s also the question of quality control and fires.
Getting a Good Deal on a Genuine Dell Battery
If you’re looking specifically for a Dell battery, you may be turned off by the high price on the Dell website. Don’t worry! If you use the website’s chat feature, you can almost certainly get a steep discount on a battery without even asking! This works for most of their replacement parts, as well.
Why does Dell discount so heavily?
They know you’re shopping around and want to make the sale! You can even make the purchase from within the chat session. We requested a price quote on a battery marked at nearly $290 on the website. Our quoted price, including shipping, came to just under $85. That’s still more than an aftermarket battery from $29-$59, but you can expect the battery to perform flawlessly in your machine or get a free replacement under the new battery warranty!
shopping by dell part number
It makes things a lot quicker and easier if you have the Dell Part Number, often abbreviated DPN or DP/N, from the back of the battery. Otherwise, you might end up getting the wrong battery. The replacement battery may have a new Dell Part Number, but you can be sure of getting the exact replacement you need.
The best replacement Roomba batteries of 2018
Roomba’s are supposed to be relatively hands-free, having revolutionized the way we clean our homes. If there is a battery without electricity or a replacement battery from a dead manufacturer, it may destroy your experience with the device.
Having experienced my fair share of Roomba battery woes, I decided to compile the knowledge that I have gathered below.
This is a compendium of both my personal experiences as well as the experiences of close friends, associates, and other souls on the internet who have shared their stories. Hopefully you find this helpful for your situation.
1 Tenergy Replacement Battery
Compatibility: Roomba 500, 600, 700 and 800 Series
Tenergy is one of the more popular Roomba battery replacement choices, primarily because it is a good value for the money. At about $30 per battery pack, it is not a terribly risky investment.
Tenergy says that it lasts as long – or longer – than the factory battery packs from iRobot. Knowing this, we were eager to test it out for ourselves.
When we received this battery pack from Amazon, we were surprised to see that the labeling was actually 35000mAh (3.5 Amp/hr.). On the product page it had been listed as a 3.3Ah. When we tested it out, the battery lasted almost as long as the factory default brand that comes standard with the roomba 550.
We can reliably get about 1.5-1.45 hoours out of it, if we push it to the max. While it wasn’t quite as strong as advertised, it certainly did the job for us.
The bottom line is that you get what you pay for. This battery is a quality third party budget replacement. It will provide more than enough juice to get the job done for 90% of Roomba owners.
It is not the best replacement battery we have seen, but it is the best value for the money. The best place to buy the Tenergy packs is definitely on Amazon.
They generally have the best prices for this brand, even better than retail outlets. Use our link below to go to the right version of product page to see the latest prices.
2 Pwr+ Extended Capacity Replacement Battery
Compatibility: Roomba 500, 600, 700 and 800 Series
The Pwr+ replacement iRobot Roomba 500 Vacuum Battery is at a slightly higher price-point than the Tenergy battery pack, but does offer a substantial increase in quality.
Despite going for close to $40 per pack, Pwr+ is still a much more affordable option than purchasing from iRobot directly. It also has some nice “extra” features that set it apart from some of the competition.
First and foremost, this is a reputable company with a good track record with Roomba devices.
Pwr+ products are certified by a number of trade associations and promise a 50% greater “useful” battery life than the original factory Roomba batteries. Best of all, they have a 30 day money back gaurantee, should anything be clearly wrong.
Furthermore, they have excellent phone support and offer free exchanges within the first year of ownership. They also offer to pay for the shipping.
Pwr+ was actually the first after-market battery pack we had to purchase after our Roomba 630’s battery died and it has lasted us for over two years and still going strong!
If you are looking for a combination of quality without breaking the bank, this is the best roomba replacement battery option. Visit our link below for the latest pricing. Usually orders qualify for free shipping, which can actually make it almost as affordable as the Tenergy.
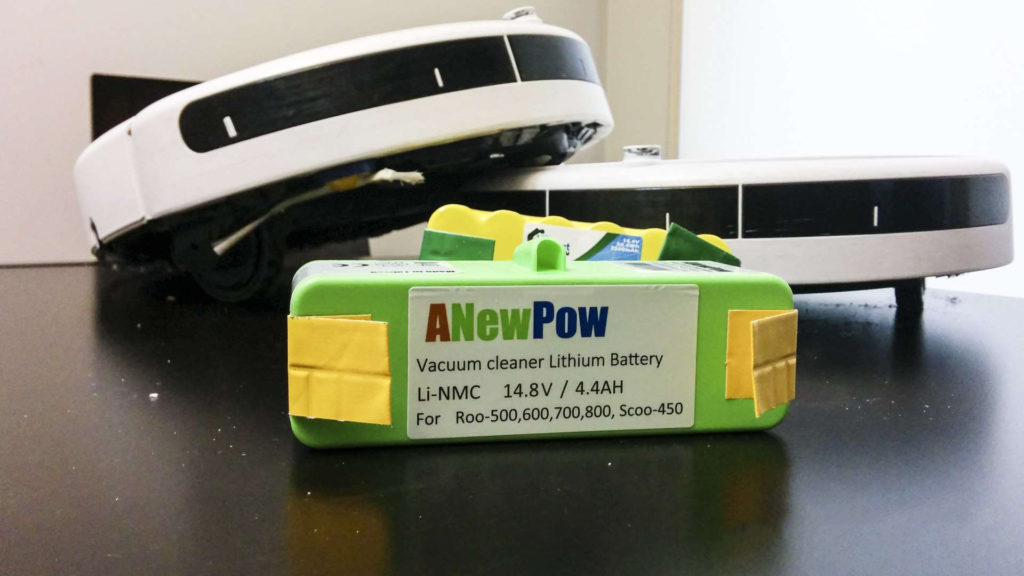
3 ANewPow Lithium Roomba Replacement Battery
Compatibility: 500, 600, 700, and 800 Series (also Scooba 450)
For people who know about batteries, lithium batteries are considered the mercedes-benz of batteries. Similarly, the lithium battery packs super-charge the Roomba vacuums, adding longevity over the default factory batteries.
ANewPow is a relative newcomer to the replacement battery market, but they offer a serious upgrade and have received rave reviews from customers.
When we unpacked the lithium pack we were immediately impressed by the difference in quality (just externally). I had heard many good things about the lithium packs, so I was eager to test it out.
While we have only had it for about 5 months, it has been holding up incredibly well. We have noticed a marked increase in the cleaning quality as well. This could be for a variety of reasons, but is likely because our Roomba 770 can make more persistent passes over our floors.
Initially when this pack was first released there were some compatibility issues with a few of the Roomba series. However, these problems have since been fixed and works perfectly with all the versions listed above.
This battery pack comes in as a high end battery replacement pack at close to $56 per pack, but is head and shoulders above the low-grade battery packs flooding the market at lower price points.
If you are looking for a safe, definite winner, then you can’t go wrong here. See the link below for the latest deals and prices.
What to Stay Away From
Knowing what NOT to buy is important because the secondary battery market is flooded with options right now, some not so good. I would personally stay away from a few brands that I have either a) personally had issues with or b) have heard significant negative feedback about.
It’s not that these batteries are absolute garbage, but more that they will not be much of an upgrade over the factory issued ones or – in many cases – worse. I have had very mixed experiences with Powerextra battery packs.
They feel cheap when you get them and of the 3 I have purchased over the years for various models, only one held up as advertised. UPDATE: It looks like things have improved with Powerextra since I originally wrote this article. I can’t vouch for all of them – it appears some of them still have problems – but the PowerextraTM pack at this listing has held up for over a year so far on one of my Roomba 770 models.
Replacement Batteries for the 537 Series
Because this is a significantly older model, the Roomba 537 replacement battery packs are unique stand-alone products. Most of the new replacement batteries (listed above) will not be compatible with a Roomba 400x.
Fortunately, the previously reviewed companies do have similar quality options for the 400 series Roomba’s.
General Tips to Prolong Your Battery Life
After fielding a variety of questions from readers and friends, I decided to tack on this little resource for getting the most out of your battery packs. Nothing is more frustrating than having to keep re-purchasing replacement packs every few months. Many times, simple maintenance can solve these common issues.
Run the Battery to Empty: Like with many electronic devices, it’s important to fully use your battery charge as much as possible. Especially on your first run with a new battery pack, let it fully exhaust itself before recharging.
Use It! This seems self-explanatory. Why invest in a Roomba if you aren’t going to use it? Still, letting them sit – particularly in the charging base or in an attic somewhere – indefinitely is not a good thing. It’s a machine and machines are built to run.
Clean the Brushes: A lot of times clogged brushes are the prime culprits. The Roomba has to work harder to clean as the brushes become more tangled. I make it a point to clean them at least once per month (assuming regular use during the week).
Store the Roomba Properly: If you are going away for a while or just not planning on using your Roomba, make sure to follow the proper “vacation” procedures.
This means 1) charging the battery fully, and 2) removing it from the Roomba (unscrewing it in the back) and store them both in a safe, dry, and cool place.
Why your laptop battery not charging
The capacity of the battery will gradually decrease (without exception) in all devices. This problem is irreversible, although you can follow some practices to maximize battery life. However, if the laptop battery is not charged, then this is a completely different problem, which can be handled in most cases. In this article, you will find the most common reason for this problem and the most effective solution.
Is the charger plugged in? Does the outlet work?
The following reasons for a non-charging laptop battery may sound ridiculous, but they are true- it has happened to even the most advanced users.
- The laptop’s charger is not plugged in
- The charger is not connected properly with the laptop
- The outlet may not have power
Some chargers have a light that indicates whether the charger itself is receiving power properly.
However, if yours doesn’t have such an indicator, then you ought to look into the matter more thoroughly. A simple check in this case won’t cost you anything, and it’s worth doing so before moving on to more drastic solutions when the battery is not charging, like visiting a technician or buying a new Hp elitebook 8530p laptop battery.
The charger’s cable is damaged
Another simple check is to see if there are any damages in the charger’s cable itself.
Sometimes the damage is evident, especially at points where the cable meets the adapter, or the laptop.
Usually, however, the damage of the cable may be internal, thus no evidence of damage can be seen from the outside.
Does the problem get resolved temporarily by moving the cable, or if it is positioned at a certain angle? If yes, then it is certain that it has been damaged internally.
If the adapter consists of two pieces, and the removable part is damaged, you can simply replace the cable.
But if the damage is in the adapter’s embedded cable, then you need to replace the whole HP EliteBook 8530p Laptop AC Adapter.
Such damage can occur for several reasons:
- The cable has stayed creased for a long time
- The cable is regularly pressed, e.g. with a chair
- The cable is folded too tightly when not in use
Something else that you can also check is whether the adapter smells like burnt plastic. It is a clear indication that something is wrong.
Overheat
There are countless problems that can be caused from overheat, and these include a laptop battery that cannot be charged.
This has two different explanations:
On one hand, the laptop might stop the charging function itself. The reason is to reduce the risk of fire due to increased temperature, since there are documented cases where fires have started from laptops.
On the other hand, the battery sensor might malfunction due to increased temperature, so it ends up sending wrong information to the system.
Driver problems in Windows
Laptop batteries are not simply larger versions of classic batteries with different shapes. Instead,they are complex electronic devices; they actually have their own operating system (firmware). In order to be used and charged, they communicate directly with the computer’s operating system.
So, if Windows displays an indication which says that the laptop is connected to the power supply but the battery is not charging, then the battery’s driver might be culprit. And yes, there is a specific driver for the battery. No, it is not a driver that can be downloaded and installed somewhere- it is integrated within Windows.
If the laptop battery is not charging and the above message is shown, then follow these steps:
- Shutdown the computer
- Completely remove the battery
- Open the laptop using only the power supply.
Next, open Device Management:
- Press
Win + Rto open the Run window (Winis the Window button on the keyboard) - Type
hdwwiz.cpl - Hit Enter
In the “Batteries” category, right click on the “Microsoft ACPI-Compliant Control Method Battery” item, and then click on “Uninstall” to remove the driver.
If, for some reason, there are multiple such battery drivers, uninstall them all.
Then shut down the computer and connect the battery again. If the problem was due to the driver, it will be resolved and the battery will be charged normally.
This method is highly likely to help in cases where the battery works fine, but Windows indicates that there is no battery connected.
Dust on the battery’s contacts
If the previous method did not fix the Windows message which says that the battery is not charging, it is quite likely that has been gathered on the battery’s contacts.
In this case, simply clean the battery’s contacts, as well as the laptop’s battery slot. To do this, just use a cloth or a cotton swab and rubbing alcohol. Obviously, the laptop should not be plugged in during this process.
This usually happens in a laptop which is constantly plugged in and the battery is removed, since exposed contacts gather dust. But even if the battery is always equipped, a simple clean as mentioned above should be performed every few months, especially if you use the laptop in different environments or in public places.
When is a visit to the technician necessary?
So, after you’ve tried all of the above and the battery will still not charge, then chances are that either the battery or the laptop has a problem. The best solution in this case is to get the laptop for an authorized service. The technicians will determine whether the problem is coming from the battery or the laptop.
Then, you could possibly purchase a new battery, but if it’s the laptop’s fault, another battery wouldn’t fix the problem. Therefore, let the technician explain the issue to you, and then you can decide whether you should buy a new battery, a new charger, a new laptop, or let the technician fix the current problem (if it can be fixed).
Last but not least, make sure that you include battery saving techniques when using your laptop, which will help you avoid these kinds of problems.

